About Me

I love to cook and more importantly, I like to improve the way I cook certain dishes. As such, this blog is borne out of a desire for a simple and organized way to manage the different variations of the dish that I tried. I will be posting recipes, pictures and comments on what works for me and what don’t. Hopefully, you will enjoy your time here, and do remember to give your feedback! Cooking is a constant evolution, a process and definitely not an end result!
Showing posts with label Dessert. Show all posts

Ritz Biscuits with Tuna Spread and Cherry Tomatoes

by | | 0 comments
Ritz Biscuits with Tuna Spread and Cherry Tomatoes
A simple 2 steps recipe that is easy to prepare, and look great for a party, in a intimate event or just as an appetizer before the main course.

Ingredients (for 8 Ritz Biscuits)
  1. 8 Ritz Biscuits
  2. 4 Cherry Tomatoes (Cut into half)
  3. Tuna Spread (eg. Brand Ayam)
Steps
  1. Spread Tuna on Ritz biscuit, approx 1/3 tablespoon for each biscuit.
  2. Top it with half tomato for each biscuit
Good as a finger food in a party or as a side or starter before the main course.


[Guest Post] Buttermilk Biscuits and Strawberry Jam by Qiana Di Bari

by | | 0 comments


We had some strawberries in the fridge that were losing their luster, in perfect condition for a simple jam. Jam needs a medium and there is nothing better than buttermilk biscuits. Bingo! Breakfast. 


My simple versions of both are loosely based on Epicurious recipes. Perfect for a spring weekend, thirty minutes is all you'll need. 


yield: Makes 6 biscuits

Ingredients: 


  • 1 1/2 cups all-purpose flour
  • 1 1/2 tablespoons sugar
  • 1 1/2 teaspoons baking powder
  • Rounded 1/4 teaspoon salt
  • 1/4 teaspoon baking soda
  • 1/2 stick (1/4 cup) cold unsalted butter, cut into 1/2-inch cubes
  • 3/4 cup well-shaken buttermilk
  • 1 tablespoon milk or cream for brushing biscuits
Put oven rack in middle position and preheat oven to 425°F.

Sift together flour, sugar, baking powder, salt, and baking soda into a bowl. (I got a little help from Jada and Michele here.) 


Blend in butter with your fingertips until mixture resembles coarse meal. 

Add buttermilk and stir with a fork until a dough just forms (dough will be moist).

Turn dough out onto a well-floured surface and knead gently 6 times. Pat out dough on a floured surface with floured hands, reflouring surface if necessary.  

I went old school and used a simple tea cup to cut my biscuits. 


Transfer as many as you can make with your dough to a greased baking sheet, arranging them 2 inches apart, and brush tops with milk or cream. 

Bake until pale golden, 12 to 15 minutes, then transfer to a rack to cool to room temperature.

 
On to the strawberry jam. You can make this while the biscuits are baking. It takes about the same time. 

yield: Makes about 1 1/2 cups
Ingredients: 


  • 1 pound fresh (or frozen, thawed) hulled, quartered strawberries
  • 1/2 cup sugar
  • 1 large Granny Smith apple, peeled, coarsely grated
  • 1 tablespoon fresh lemon juice

Combine 1 cup hulled, quartered strawberries and 1/2 cup sugar in a large heavy skillet. 

Stir in 1 peeled, coarsely grated large Granny Smith apple. 


Cook over medium-low heat, stirring and breaking up strawberries, until sugar dissolves. 

Simmer until jam is thickened, 10-15 minutes. 

Stir in 1 tablespoon fresh lemon juice. 

Transfer to a bowl or jar; let cool. 


Bio
Qiana Di Bari is a music business manager turned mom, wife and restaurateur. You can follow the tastes and travels of her modern, multi-culti family at http://www.lafamigliadibari.comor @qiqs.

Rasins Muffins

by | | 0 comments
Rasins Muffin

Rasins Muffins Overflow in Oven

This is the first time I baked muffins and I chose Rasins Muffins as I would think that it is the simplest to prepare with just Rasins as one of the main ingredients.
 
The whole baking process was a mess! I forgot to buy muffin tray and I thought using muffin paper cups will be able to hold up the muffin, but I was WRONG. The muffin mixture flowed out of the paper cups and my whole microwave oven was flooded with muffin mixture. Only one out of ten muffins was a success with a "muffin" look! =(
 
I am not giving up on baking, but I guess I must make sure that I have the right set of tools before I will go for the second try! =)

Ingredients
  1. 180g of Plain Flour
  2. 110g of Caster Sugar
  3. 60g of Butter (Melted)
  4. 2 small eggs (Beaten)
  5. 1/2 tablespoon of Baking Soda
  6. 80g Rasins
  7. 120g of Milk (I used HL milk)
Steps
  1. Sieve Flour in a big mixing bowl
  2. Sieve Baking Soda
  3. Sieve Caster Sugar
  4. Mix well
  5. Add Butter, Eggs, Milk and mix well by using folding in method. (the mixture must remain thick and not waterly.)
  6. Fold in Rasins
  7. Put paper cups into muffin tray and fill up 3/5 of the paper cups with muffin mixture.
Bake Muffin into a preheat oven for approx 20 minutes, 200 degree celius.
Use a toothpick to check if it is cooked. If the toothpick is dry, the muffin is ready!
     

[Guest Post] Kanakuk Coffee Cake by Jay Holden

by | | 0 comments


Kanakuk Kamps are summer sports camps located in Branson, Missouri. Each year, the camps serve over 10,000 children, and their favorite treat each summer is Kanakuk Coffee Cake. Campers dream about it, Tweet about it, and crave it all year, but now you can make it any time you want!

Topping (prepare day ahead and refrigerate)
3/4 cup brown sugar
1/3 cup flour
1 tbsp. cinnamon
2 oz. butter

Instructions:

Combine brown sugar, flour and cinnamon and mix well. Cut butter into small pieces and work into dry ingredients with hands. Refrigerate overnight.

Cake
3 cups flour
11/2 cup sugar
2 1/2 tbsp. baking powder
11/2 tsp. salt
2 eggs
1 tsp. vanilla
1/3 cup margarine
1/3 cups water
2 cup evaporated milk

Instructions:

In a medium bowl, combine flour, sugar, baking powder and salt and mix well. Set aside. (Note: Dry ingredients may be mixed the day before, covered and left at room temperature.) Spray 9x13-inch pan with pan spray. Beat eggs in a large mixing bowl until fluffy. Add vanilla and evaporated milk. Combine margarine with water, then pour slowly into batter and mix on low speed. Turn mixer off. Add small amount of dry ingredients and turn mixer on low to combine. Mix well. Scrape bowl and repeat until all dry ingredients have been incorporated. Beat until batter is smooth. Pour batter into prepared pan. Sprinkle topping (prepared before) on top of cake batter, covering well. Place in oven and bake at 350 degrees for 30 minutes. Cool and cut into 3x6-inch pieces to serve.

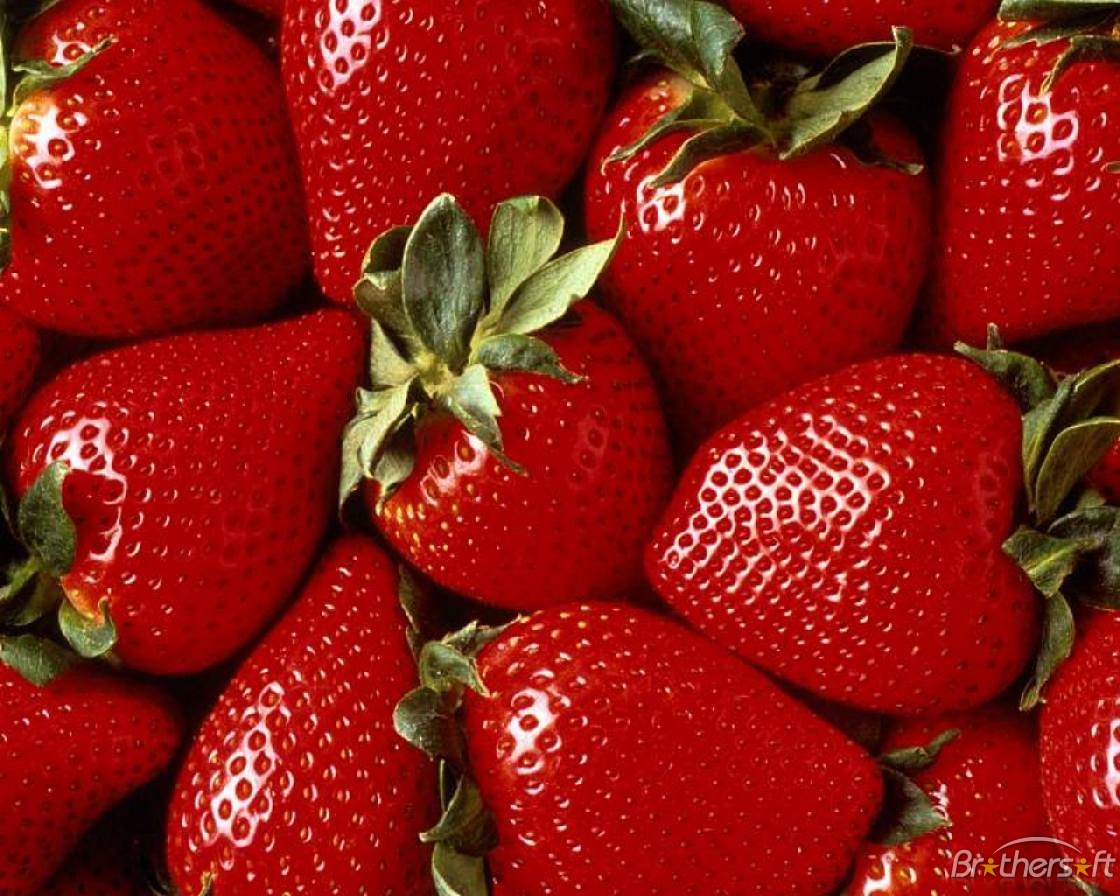
[Guest Post] How to pick the perfect pack of strawberries by Casey Haslem

by | | 0 comments


How to pick the perfect pack of Strawberries

Summer. The season brings long, hot days to the table as well as a wealth of fresh, ripe fruit. One such summertime treat is the strawberry. Red, juicy and sweet, this delicious fruit is a staple in the hot months and can be very affordable for today's family. Here are just a few tips to pick the perfect pack of strawberries and save money while getting the pick of the crop.

The first rule of thumb when selecting a good strawberry is to take in its color. What you'll want are berries that are a vibrant red and as free from green and white spots as possible. Keep in mind, strawberries do not ripen after being picked, so finding fruit with a rich red hue is key in picking the perfect fruit.

In addition to the color, you'll need to steer clear of any berries with visible soft spots. Strive to choose fruit which is firm and without any patches of mold. Even if only one berry in the bunch has mold, it can quickly spread to the rest of the pack.

Another tidbit to keep in mind is the size of the berry. While some strawberries in the local grocer's are an impressive size, it is said berries on the smaller size (think one-and-a-half inches for length and width) have a more concentrated sweetness.

Once you've got the hang of what to look for when picking out a package of delectable red berries, you'll want to seek out ways to make this summer bounty even more affordable. As with any fruit (or vegetable, for that matter), buying something that's in season will always lessen the cost. Yes, you can find strawberries around Christmas, but you can also expect a hefty pricetag to accompany the package whereas June or July will find the same fruit much more affordable.

Another way to keep your costs down when shopping for strawberries is to watch your local store circulars for sales. Learn what a good base price is for a pack of berries so you can be a savvy shopper, and when you see a good deal, pounce while the price is as hot as the temps outside.

Using coupons is also a great way to maximize savings and can be used even for fresh items like strawberries. Writing a company (such as Driscoll's) can net you money saving coupons; use in conjunction with a sale for the best price possible.

If you are interested in learning more money saving tips, try FreeStuffAndSamples.com or TheCouponCupboard.com.

[Guest Post] Chocolate Hazelnut Cheesecake by Sarah

by | | 0 comments

 
Chocolate Hazelnut Cheesecake
From Sarah @ The Sweet Life
Thesweetlifeonline.blogspot.com

 
I have to admit, I used to have a sort of prejudice against desserts catering to dietary restrictions, disbelieving in the potential goodness. Oh was I wrong. This is one of my favorite desserts I have ever made. Ever. The chocolate hazelnut cheesecake is so rich and creamy and pure. But wait there's more, it's also healthy!

Raw Chocolate Hazelnut Cheesecake
gluten-free, soy-free, sugar-free, raw, vegan

Crust
1 cup hazelnut meal
1/4 cup + 2 Tbsp raw cocoa powder
3 Tbsp maple syrup
1 tsp vanilla
1 pinch sea salt

The best pan to use for this recipe would be a Flexi-pan or other type of silicone mold. Otherwise a spring form pan works great. If you're very brave and don't have a Flexi-pan but want individual cheesecakes, use a muffin pan, lightly oiled. It will take a little tlc to get the cheesecakes out, but you can do it! This recipe would fill a 9" spring form pan or about 12 individual molds.

Blend all ingredients together in a food processor until it starts to come together. Press the crust into the bottom of desired pan, about 1/4 inch thick.

Set aside while you making the filling.

The Filling
2 cups raw cashews, soaked and rinsed
1/4 cup + 2 Tbsp hazelnut butter (peanut butter works too)
1/2 cup coconut oil, melted
1/2 cup maple syrup
1/2 cup cocoa powder
1/2 cup water
2 tsp salt

In a food processor or mixer blend together cashews, maple syrup, water, and salt. Mix until totally smooth, scraping down the sides of the processor as necessary. Add cocoa powder, hazelnut butter and coconut oil to cashew mixture and blend all together, scraping down again, until mixture is uniformly combine.

Spoon or pipe filling on top of crusts. Stick cheesecake in the freezer until solid all the way through (at least 2 hours for individual cheesecakes, 4 for large cheesecake).


Once frozen remove cheesecake from pan. If using silicone mold, they will easily pop out. If you have a muffin tin, run a sharp, hot knife around the edges of each cheesecake, flip tin upside down and give it a few good whacks again the counter. They could start to slowly side out at this point. Be patient, gravity is on your side. If a few minutes have past and the cheesecakes are still refusing to drop, use a lighter to heat the bottom of the tin briefly; the heat will help release the cake.

Place cakes in the refrigerator and make the chocolate sauce.

 Chocolate Sauce
1/3 cup coconut oil, melted
1 tsp vanilla
1/4 cup maple syrup
1/4 cup cocoa powder

Mix ingredients together with fork. Scoop a little onto cold cheesecake. Place back in fridge and let sauce harden.

Top with hazelnuts. Serve cold.


Peach in Choya (Cocktails Desserts) in 5 minutes

by | | 0 comments
Peach in Choya (Cocktails Desserts)

I started Shan's recipes 9 months ago, but I have only published one dessert recipe (without photo). In the subconscious mind of mine, desserts have to be cake. And as I do not have a mixer, baking cake and puffs are almost impossible.

Recently, when I was shopping at Spotlights, there was a 30% storewide discount. I saw these beautiful dessert cups that cost only $12 (for 4 pcs) after discount. I hesitated for some moment, deciding if I should buy or not. As the price is too irresistible, I bought it, giving myself no excuse not to try some desserts recipes.

While I was drinking Choya a few days back, a flash of thoughts tell me that Choya will go quite well with Peach. If you will want to know, how does it taste like, try the recipe now. It is so easy with just a 5 minutes steps.

Ingredients (for one cup)
  1. Fresh or Can Peach (4 slices in each cup)
  2. 2 tablespoon of Choya
  3. 1 tablespoon of Water
Steps
  1. Place peach into cup
  2. Mixed Choya with Water and add into cup
  3. Chill it overnight
Serve while Chilled!

Go to be served in an intimate event, a party, or simply as a desserts after a romantic dinner!

[Guest Post] Homemade Biscotti by Dina-Marie

by | | 0 comments

If you are like me and love your coffee, be it morning, afternoon or night, you also enjoy biscotti. But also like me, you might not enjoy it as often as you would like because of the price. Besides that, most recipes are too involved and do not turn out quite right. Here is a wonderfully easy and good recipe. I will first give the basic recipe and then some variations.

Pecan Biscotti
1/4 c. butter                             1 whole egg white
3/4 c. sugar                              2 c. flour
1/2 tsp salt                                1 1/2 tsp baking powder
1 tsp vanilla                               3/4 c. chopped pecans
1 whole egg                               1 egg white beaten (to brush on top)

Preheat oven to 350F.
Mix butter, sugar, salt and vanilla.
Add egg and egg white - mix well.
Add flour, baking powder and nuts. Stir well adding a bit more flour if needed to make a sticky but workable dough.
Form dough into a long log about 3/4 inches high and 2 1/2 - 3 inches wide and 15 inches long. Brush top with beaten egg white.


Bake in preheated oven 350F for 30-35 min.
Remove from oven and after a couple of minutes, lift log off pan to cutting board. Cut into bars about 1/2 inch thick.


Place bars cut side up on cookie sheet and return to oven. Bake for 15 - 20 minutes longer.


Cool completely and store in an airtight container.
Variations: I have used all white flour and also used half whole wheat and half white flour.
Substitute maple flavoring for vanilla.
Add 1/2 c. dry fruit such as dried apricots to batter.
Any nut may be used such as hazelnuts or almonds.

Bio: Dina-Marie has 10 children and blogs at Dimes2Vines.com. She lives in west Texas and enjoys working with her family in the vineyard, blogging about their life experiences and their lifestyle change from the corporate world to farm life.

[Guest Post] Homemade Doughnuts with Chocolate Coating by Dina-Marie

by | | 2 comments
One of our family favorite delicacies is homemade doughnuts. You can not go wrong with them. Whether you glaze them, fill them with creme, use an icing, or eat them plain, they please everyone.
They are:
  • fun to mix up
  • fun to roll out
  • fun to cut out
  • fun to cook
  • fun to eat
They are just a FUN food! They are a must for everyone to try! The following recipe reportedly makes about 2 dozen doughnuts. I am not sure about that because we triple and sometimes even quadruple it! And now, for the recipe ...

Homemade Doughnuts

1 qt milk warmed
10 Tbs sugar
8 Tbs oil
1 Tbs salt
1/8 tsp nutmeg (opt. more or less to taste)
7 Tbs dry yeast
4 c all purpose flour
4 c whole wheat flour

Preheat deep fryer.

Pour milk into the bowl of your mixer. Add sugar, oil, salt and nutmeg. Add yeast last (the other ingredients help cool the milk so it does not kill your yeast).


Add the whole wheat and all purpose flour and knead until well blended and dough does not stick to the sides of the bowl.

Place on oiled surface and prepare to roll the dough out to 1/2 inch thickness. You do not need much oil, just keep the dough from sticking. We place oil on our stone dining table. This makes easy access for all the little helpers.

Roll dough out to 1/2 inch thickness and cut out. See what I mean about the little helpers!

We use a plastic glass for the large round and a smaller container for the holes. Just use whatever works!

Deep fry in oil at 375F. We use a deep fryer so I don't have to worry about the temperature - the fryer does that for me. The doughnuts will float, so, after a couple of minutes, turn them to cook the other side. You want a nice golden brown.

We use a utensil such as a plastic cooking fork - not the small white plastic ones!


Drain on paper towel. That is what the recipe says anyway, but we use a clean towel on a cookie sheet (emphasis on clean!). Use the icing or glaze desired. We dip the hot doughnuts into a warm chocolate icing allowing it to drip and then place on a platter. Unless of course, a quality control test must be done and then it ends up in a mouth. It is definitely a family affair!


Then again, who needs a doughnut to dip - fingers work great!


Mmmm! There is nothing like a freshly dipped finger!


Bio: Dina-Marie has 10 children and blogs at Dimes2Vines.com. She lives in west Texas and enjoys working with her family in the vineyard, blogging about their life experiences and their lifestyle change from the corporate world to farm life.

[Guest Post] Healthy Trail Mix Snack Recipe by Kodjo Hounnake

by | | 0 comments

If you love snack like I do, you want to make sure to avoid sugar-rich treats such as muffins, candies, or unhealthy carbohydrate-laden potato chips. Instead, you can make your own healthy trail mix snack recipe. When you make your own trail mix snack recipe, you have the ability to select healthy ingredients. Once you have the ingredients, the trail mix snack recipe can be put together in less than 2 minutes.

When you eat at least 4 to 5 small meals per day, you need very healthy snacks between breakfast and lunch, and between lunch and dinner. The trail mix snack is appropriate to eat between lunch and dinner.

In today’s fast pace world, it is very easy to make unhealthy food choices when you are on the go. You have to resist the temptation of eating sugar-rich treats such as muffins, candies and chocolate. Eating healthy snacks will ensure to keep your weight under control.

The trail mix snack recipe I am showing you today is very healthy, because it is rich in antioxidants. As you may know, antioxidants promote good health as they help avoid diseases. More specifically, antioxidants help slow down the oxidation of cells in our body. When cells oxidize, they generate free radicals, which are also known as cellular bi-products. It is perfectly safe to have a manageable amount of these free radicals in the body. However, when the free radicals are in excess, they can wreak havoc on our organism’s cellular apparatus.

What are free radicals?
Free radicals foster a destructive process within our cells, making these cells unstable. In some cases, free radicals play a big role in the formation of cancerous cells. The oxidative damage of the cells contribute to many diseases such as muscle and tissue degeneration, diabetes, heart disease, cancer, etc.

If you want to expose yourself to more antioxidants, you need to incorporate fruits and vegetables in your diet. By increasing your intake of fruits and vegetables, you help reduce your chances of suffering from a heart disease or cancer.

The antioxidant-rich trail mix snack contains a wide variety of fruits that are rich in common antioxidants such as beta-carotene, vitamin A, vitamin C, vitamin E, alpha lipoic, selenium, and melatonin. Beside the trail mix snack, cranberry sauce is also rich in antioxidants. The recipe for a homemade cranberry sauce is also easy to follow.

Ingredients for the healthy trail mix snack recipe
Healthy Trail Mix Snack Recipe
-Sesame seeds and almonds
-Dried mangoes
-Sesame sticks
-Antioxidant fusion: goji berries, blueberries, raspberries, cranberries and raisins
-Dried peaches
-Dried pineapples

Directions for the healthy trail mix snack recipe
Mix all ingredients in a large bowl, and store in an airtight container such as a resalable plastic bag.

Author Bio: Kodjo is a home fitness enthusiast who believes the average person can get and remain in great shape right at home. You do not need expensive gym equipment to achieve the body of your dreams. Your body weight is sufficient enough. See the hundreds of home workout videos and health tips on my home fitness blog

Cocktail Fruits Mayonnaise with Rasins

by | | 0 comments
Ingredients
  1. 1 Can of Cocktail Fruits (Drain off syrup)
  2. 2 tablespoons of Rasins
  3. 3 tablespoons of Mayonnaise
  4. 1 1/2 tablespoons of Condensed Milk
Steps
  1. Mix all ingredients into a mixing bowl
  2. Chill it
Serve while Chill!

Good to have this in a Party, or just an after dinner dessert treat.