About Me

I love to cook and more importantly, I like to improve the way I cook certain dishes. As such, this blog is borne out of a desire for a simple and organized way to manage the different variations of the dish that I tried. I will be posting recipes, pictures and comments on what works for me and what don’t. Hopefully, you will enjoy your time here, and do remember to give your feedback! Cooking is a constant evolution, a process and definitely not an end result!

Picks of August 2011

by | | 1 comments

Most people, excluding chefs of course, normally cook what we like to eat and all the recipes that I have posted are my babies.

Posting "Pick of the Month" is such a cruel thing for myself and it is nearly mission impossible to pick only one of out all the recipes that I have published, So I change the topic from "Pick of the Month" to "Picks of the Month". =P

Below is the list of recipes that I have posted for August categorised into Chinese, Western, Asian and Dessert:

Chinese
Western
Asian
Dessert

I have chosen 3 "Picks of the Month" as follows:

Simple and Nice Pick
Simple recipe with easy steps and little preparation
Grilled Salmon 

"Achievement of the Month" Pick
My greatest challenge with many trials and errors and it is still not my 100%!
My first grill recipe and to-date, it is still frequently seen on my dining table

Leave a comment to tell me what's your pick then? =)

Shan's Recipes Published on Foodie Blogroll!

by | | 0 comments


Yeah... Finally we are published on a food community - Foodie Blogroll! =D

Hoping to learn and share to contribute to Shan's Recipes!

Stay Tune... =)

Shan's Recipes is now part of Foodie Blogroll!

by | | 1 comments


I have always wanted to Shan's Recipes to gain more exposure, sharing my recipes to a wide range of readers and to join in food community is one of the means.

As there are different requirements for a blog to join in food community and Shan's Recipes is still a young blog, I am not quite hopeful that it will be accepted. Hence, when my application to be part of Foodie Blogroll is approved, I am so delighted!

Looking forward for Shan's Recipes to be listed on Foodie Blogroll and hopefully, one day, it will be on the featured blog of the week!

Mashed Potatoes

by | | 2 comments
Mashed Potatoes

There are a lot of different ways to cook perfect mashed potatoes, from choosing the type of potatoes, how to boil it, what kind of mashing methods, etc. But for readers and starters that are not too perfectionist, here is a simple and straightforward recipe that tastes good too. I hope you will like it.

Ingredients
  1. 5 Russet Potatoes (Peeled, and Cut into Chunks - 1 potato into 4 chunks)
  2. 1/4 Cup or 150ml Warmed Milk (low fat milk will be good =))
  3. 30g of Slightly Melted Butter or Margarine
  4. 1/4 teaspoon of Salt
  5. 1/5 teaspoon of Black Pepper
  6. Italian Herbs (Optional)
Steps
  1. Add Potatoes into a pot of water. A good amount of water is just to cover all the potatoes in the pot. Bring it to boil. Approx 20 minutes. Test by using a fork, if the fork can go through easily into the potatoes, it is done
  2. Drain the water
  3. Transfer the potatoes into a mixing bowl and Sprinkle Salt and Pepper
  4. Mash the potatoes together with salt and pepper
  5. Add Butter into mixing bowl and mash again to mix well with Potatoes
  6. Add Milk in small portion and mash again until the texture that you like. Increase or decrease the milk quantity accordingly
  7. Sprinkle Italian Herbs and mash again to mix well
Serve while Warm!

Good as a Side or with Steak or a Main Course!

Tips and Comments:
  • Add potato into pot with water at the start rather than after the water is boiled, this will enable the potato to cook from inside out gradually.
  • Cut the potato into chunks to decrease the time for cooking and it is easier to mash the potato later.
  • The result may be better if you can cook the potato with skin, and peeled later after it is cooked. But if you are not too particular, it is easier to peel before cooking.
  • Using a potato masher will help to ease the mashing progress. I bought mine at less than SGD$15.

One Month Anniversary to Shan's Recipes!

by | | 0 comments
Image from especially-balloons

Today is Shan's Recipes's one month birthday! =)

All along, I just have an interest in cooking, I guess this is inherited from my parents. They know and can cook very well. My sister can cook well too! I guess it runs in the family. I can't say I can cook very well, but for homecooked food, I earned a "pass"... I hope! =)  My cooking skills ranked 4th place in my house - first from the last! =P

When I move out from my parents' place and stay with my fiance, I start to cook regularly, and I even have my first party after one month when I am still a newbie in cooking. Readers who have read my blog on Hotdog (Sausage) with Prata should already know about this.  Oh gosh... I hope my collegues will not take my party food as a benchmark of what I cooked! =)

I learned a lot along the way, experimenting with different dishes so that my fiance won't feel bored from eating what I cooked. Learning from experience, I believe a lot of us always complain to our mums or secretly mumble to ourselves when we always see the same dish on the dining table. =)

A lot of my colleagues and friends whom I have tried to "force" to "like" my Facebook page asked me, why do I start this blog? Do you want to publish a cookbook? Are you too free? haha...

There are 2 main simple reasons that triggered the start of this blog; My colleague who has taken the Hotdog with Prata picture during the party made me realised that if he didn't take those pictures, I won't even remember what I cooked or how those food look like. From this, you should know how bad my memories are, and this leads to my second reason: Sometimes, when I wanted to cook the same dish again, I forgot what are the ingredients that I have used previously.

Though the reasons of starting this blog are so simple, but as time goes by, my ambition starts to grow.. I want people to read my blog, I want to share what I have experienced and learned with more people... 

I have been reading my blog multiple times per day, trying to improve everything that is possible within my means so that my readers will feel that it is worth it to drop by to my blog again, like my facebook page, or simply find it informative and help them in some way or another in their cooking.

Every now and then, I will look at the stats of my viewer rate and think why is my viewer rate so low? Is my blog not interesting? And then, I will start to bug Jared on this and ask him why? =) Jared, I am sorry and thanks for your helps all these while.

Thanks to my fiance for being my guinea pig on every single dish that I have cooked. =)

For all my readers and facebook fans, I will make my best efforts to keep this blog alive by continuing to experiment and post recipes and photo of my cooking.

Thanks so much for your support!

Curry Chicken

by | | 1 comments

Curry Chicken

I participated in the facebook event, "Cook and Share A Pot of Curry". Hereby sharing the photo and also a simple recipe to go along.

Knowing how to cook a pot of good curry in the past is a great thing to speak about as it is not easy with so many different types of spices, ingredients and getting the right quantity alone is not an easy task.

A lot of food manufacturers have came out with curry paste with simple recipe for busy professional and starters. So now, not knowing how to cook a pot of good curry is no longer an excuse! =)

Ingredients (Serve 3 to 4 pax)
  1. 10 Medium Chicken Wings or 1/2 kg of Chicken (cut into big pieces with bones)
  2. 2 Russets Potatoes (Peeled and Cut into Big Chunks - 1 potato into 4 to 6 chunks)
  3. 3/4 packet of Curry Paste (eg. Brand Khim Yan, A1)
  4. 100ml of Fresh or Instant Coconut Milk (eg. Brand Kara)
  5. 1 tablespoon of Cooking Oil
  6. 300ml Hot Water
Steps
  1. Add Oil in hot pan
  2. Add Curry Paste and stir for a minute to spread out the paste
  3. Add Chicken and stir to mix well with curry paste for approx 3 to 4 minutes
  4. Add hot water in small portion and stir to mix well with paste. Remember to taste it, once the taste is ok (not salty), stop adding water
  5. Add Coconut Milk slowly while stirring to mix well, now you will see that the color of the curry look like those you dine out =)
  6. Transfer the above result to a pot
  7. Add potatoes into pot and stir to immerse potatoes in curry
  8. Cook in medium to low heat until potatoes and chicken are cooked, approx 30 minutes
Serve while Hot!

Good to go with Rice, or drip the curry gravy with baguette, or well-toasted white bread. It can also be an option for an International or Asian party theme.

Tips and Comments:
  • Do not follow the ingredients quantity from the curry paste package completely, especially for water and coconut milk. Remember to taste for the saltiness and look for the color of the curry, once it is ok, stop adding.
  • Before you add potatoes, the curry may not taste like curry, but not to worry, after adding potatoes, it will turn different.
  • Add potatoes after transfer to the pot so that the potatoes will not break down so fast due to long cooking process.
  • Personally, I prefer chicken wings as curry set in nicely into the mid-joint without destroying the tenderness. The con is that the meat will break off once the timing of the cooking process is too long, but if you dont mind the look of a not-so-perfect chicken wings, then why not? =)

Aglio Olio Pasta with Prawns

by | | 2 comments

Aglio Olio Linguine with Prawns

Aglio Olio Pasta is one of the few dishes so far that I have challenged a few times before I succeeded.

I remember when I first tried it, my thoughts is, how difficult can it be? But I was very wrong, my first 2 tries failed badly, the pasta is too dry and it is nearly tasteless. It took me sometimes before I have the courage to give it another try. This is the 3rd time, and I succeeded, it tastes quite good, though it is not perfect.

My post thoughts are, the lesser ingredients required in a dish, it will take more skills and experiments to have it right.

I hope by sharing my recipe here, it will get you succeed on your 1st try! =) 

Ingredients (Serve 2 Pax)
  1. Linguine (eg. Brand Delverde) or Spaghetti
  2. 8 Tiger Prawns (Deshell and Devein)
  3. 1 1/2 tablespoon of Chopped Garlic
  4. 1 1/2 tablespoon of Chopped Red Onion
  5. Italian Herbs (eg. Brand Masterfood) or Chopped Fresh Parsley
  6. Mixed Herbs (eg. Brand Masterfood)
  7. Coarse Black Pepper
  8. Fresh Chilli (Deseed and Chopped it) or Chilli Flakes (Optional, eg. Brand Masterfood)
  9. 5 tablespoons of White Wine
  10. Salts
  11. Olive Oil
Preparation\
  1. Sprinkle Salt, Pepper, Mixed Herbs on Prawns, leave it for 10 to 15 minutes for the ingredients to set in
Steps
  1. Add 1 tablespoon of Olive Oil and 1 teaspoon of Salt in boiling water
  2. Add Pasta and cooked as per indicated on Pasta packaging (approx 7 to 11 minutes for Al Dente)
  3. Once cooked, drain water and raise with cold water to stop heating process
  4. Add 4 to 5 tablespoon of Olive Oil in hot pan
  5. Add Onion in hot pan and stir-fry until fragrant (translucent)
  6. Add Garlic and stir-fry until fragrant (before it turns brown)
  7. Add Prawns and stir-fry until 90% cook, approx 3 to 4 minutes, remember to flip and ensure both side of the prawns are taking care of
  8. Add White Wine and stir until it is hot approx 1 to 2 minutes
  9. Turn to low heat, add Pasta, sprinkle 1/2 teaspoon of Salt and toss well for 1 to 2 minutes for flavors to blend into pasta
  10. Sprinkle Mixed Herb or Fresh Parsley and Chilli Flake and toss until it is well mix into the pasta
Serve while Hot!

Good to serve with Side or Finger food.

Tips and Comments
  • Garlic & Oil are the two important ingredients in Aglio Olio Pasta, hence don't be amazed by the quantity as they will make the pasta taste good. Adding lesser quantity may taste too bland.
  • So far, I have not seen any food blog or cookbook that mentioned Red Onions as one of the ingredients for Aglio Olio. I have tried and I do trust that it tastes better.
  • Anytime during the cooking process, if the heat get too strong, remember to turn down to medium or low heat to avoid burning the garlic or drying up the pasta.
  • It is recommended that Olive Oil to be used rather than other cooking oil as it tastes better and healthier.
  • I prefer Linguine than Spaghetti for Aglio Olio, but this is a personally preference!

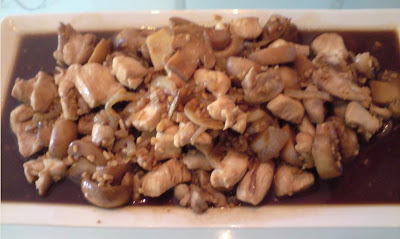
Stir-Fry Chicken with Button Mushroom

by | | 0 comments

Stir-fry Chicken and Button Mushroom

Singaporean will find this dish familiar and many should have try it before.

This is a dish that you will find in "Mum's kitchen" or in a Mixed Vegetable Rice Stall (A stall that you can find in almost every foodcourt in Singapore. There are different kind of chinese dishes from the stall that you can choose from, to goes with rice or porridge).

This is a dish that I will not grow tired of it and it goes so well with plain rice, especially with its gravy. Sometimes, one round of rice is not enough! =P

Ingredients
  1. Quarter Chicken (Sliced and Deboned-Optional)
  2. 1/2 Can or 100g of Button Mushroom (Sliced, eg. Brand Narcissus)
  3. 1/2 Yellow Onion (Sliced)
  4. 3 slices of peeled Ginger
  5. 1 tablespoon of Garlic (Chopped)
  6. Olive Oil or Other Cooking Oil
  7. 2 teaspoons of Light Soya Sauce (eg. Brand Tai Hua)
  8. 2 teaspoons of Dark Soya Sauce (Salted) (eg Brand Tiger)
  9. 1 teaspoon of Dark Sesame Oil
  10. 1 teaspoon of Hua Diao Jiu
  11. 1 tablespoon of Oyster Sauce
  12. Olive Oil or any Cooking Oil
Steps
  1. Add Oil on hot pan
  2. Stir-fry ginger on hot pan until fragrant
  3. Add Onion and stir-fry until fragrant
  4. Add Garlic and stir-fry until fragrant
  5. Add Chicken and stir-fry until 80% cooked
  6. Add Button Mushroom and stir-fry for approx 2 minutes
  7. Add Oyster Sauce and stir-fry
  8. Add all other sauces and 2 to 3 tablespoon of hot water until chicken is cooked
Serve while Hot!

Good to go with Rice and one bowl of Soup and 2 more Chinese Dishes.

Tips and Comments:
  • Stir-fry according to the order; 1st Ginger, 2nd Onion, 3rd Garlic - this is to allow time for each ingredients to stir-fry until fragrant without overcooking or burning them. 
  • As this dish comprises of different type of sauces, some brands may be taste more salty than others and vice verse, hence it is important to test if the taste is right before adding the right amount of hot water.

Baked Oysters with Cheese, Herbs and White Wine

by | | 0 comments

Oyster with Cheese, Herbs and White Wine

Oysters are not cheap when you dine in a restaurant, regardless they are fresh or baked or carpeted in a steak. Since I have not experimented with recipes that include oysters as ingredients before, I decided to give it a try. I can say that my first try taste not bad at all! =)

Ingredients
  1. 8 Frozen Oysters (Dethawed)
  2. Shredded Mozzarella Cheese or Parmesan Cheese
  3. Mixed Herbs or Dried Parsley will do
  4. 2 teaspoons of White Wine
Steps
  1. Drip 2 teaspoons of White Wine evenly onto 8 Oysters
  2. Add Cheese and Sprinkle Mixed Herbs or Dried Parsley on Oyster
  3. Put Oyster into preheat Oven at 200 Degree Celsius approx 10 minutes
Serve while Hot!

Good to serve as Side, Party Finger food, or go with Steak and White Wine.

Tips and Comments:
  • This recipe is so easy to cook with minimum preparation.
  • As those oysters that I have purchased does not come with shells, hence I use Aluminium foils to make into shells lookalike to keep the ingredients in placed on the oyster. If this is too troublesome, you can use paper cups meant for cupcake or muffin baking tray.
  • Add some bacon bits if cheese alone is not too interesting for you.
  • Instead of White Wine, you can add some Sherry or Lemon Juice.

Scallops with Bean Vermicelli (Glass Noodle)

by | | 1 comments

Scallops with Bean Vermicelli

I can't forget the Scallops with Vermicelli that I have tried in Crystal Jade Restaurant (Chinese Restaurant in Singapore). The delicious gravy blends in so well with the scallops and vermicelli that I am never satisfied with just one serving. Hence I went to the supermarket to source for frozen scallops, intending to try out this dish. I have done my homework by researching food blogs and the result is pretty good. Give it a try, especially if you like Hong Kong Cuisine! =)

Ingredients
  1. 1 roll or 50g of Bean Vermicelli (Glass Noodle/ Tang Hoon)
  2. 8 Frozen Scallops (Medium - approx 2cm in diameter, Dethawed)
  3. 1 tablespoon of Chopped Garlic
  4. 1/2 tablespoon of Grated Ginger
  5. 1 tablespoon of Light Soya Sauce (eg. Brand Tai Hua)
  6. 1 teaspoon of Hua Diao Jiu (Chinese Cooking Wine)
  7. 2 tablespoon of Olive Oil
Preparation
  1. Immerse Bean Vermicelli into water until soften and drain it
  2. Spread out Bean Vermicelli on a steam-proof plate
  3. Place Scallops on Bean Vermicelli
Steps
  1. Add Olive Oil into hot pan
  2. Once Olive Oil is hot, add Ginger and stir-fry for approx 1 minute
  3. Add Garlic and stir-fry until fragrant or before it turns brown
  4. In very low heat or you can switch off the stove, add Light Soya Sauce and Hua Diao Jiu, stir to mix well
  5. Pour the mixture onto the Scallops and Bean Vermicelli
  6. Steam it for approx 5 minutes (Check if Scallops is cooked after 4 minutes and adjust the time accordingly
Serve while Hot with another 2 to 3 more Chinese dishes.

Tips and Comments:
  • Peel the ginger before grating. If you do not have a grater, slice the ginger and chop it finely. If there is any ginger's juice, add them together during the stir-fry process.
  • Dethaw frozen scallops by dipping into tap water. It is important to keep scallops in a sealed bag to retain the original taste of the scallops.
  • Note that when grated ginger is added into hot pan with oil, it will start to react and "fly around", you can reduce the heat or turn off the stove once the oil is hot before adding ginger and garlic. If the heat is not strong enough to cook the ingredients, turn on the stove again.
  • Do not overcook the scallops as the meat will turn tough and chewy. Once the scallops turn translucent, it is done.

Roasted Chicken with Vegetables

by | | 0 comments

Roasted Chicken with Vegetables

Who don't prefer a smoke-free, grease-free kitchen?

Especially nowadays when open concept kitchen is such a lovely thing to have in our house, the main concern is that if you cook, it's going to be a big NO for a lot of families due to the inevitable smoke and grease generated.

A powerful cooker hood may minimise our concern, but the size of a cooker hood increase with its suction power. That's what I found out when I was shopping for my kitchen appliances. I believe that a lot of young families or families that have moved to a new house will have the same consideration as I do with regards to space constraint - Do we want more storage space or a powerful cooking hood? To satisfy the curiosity of some readers, I chose more storage space. =)

The show stopper for cooking to most people is the post-cooking effect - Wash up time!

Roasting, grilling, baking may seem to be a tough mission but I have to disagree with that! Cooking can never be easier with a Microwave Oven in our kitchen. More importantly, using a Microwave Oven is smoke-free, grease-free and healthier!

Ingredients
  1. Half Chicken
  2. 1 Carrots (Cut into Big Chunks)
  3. 2 Potatos (Cut into Big Chunks)
  4. Broccoli (Cut into Big Chunks)
  5. 1 Yellow Onions (Cut into Big Chunks)
  6. 4 Cloves of Garlic (Slightly Smashed with Skin)
  7. Olive Oil
  8. Salts
  9. Coarse Black Pepper
  10. Mixed Herbs (Rosemary, Parsley, Basil, Oregano. eg. Brand Masterfood)
Steps
  1. Grease Olive Oil on baking tray
  2. Spread all vegetables on baking tray (Vegetables that are easier to cook should be placed under Chicken to avoid overcook)
  3. Sprinkle some Salts, Pepper, Mixed Herbs on Vegetable
  4. Rub Salts & Pepper on Chicken
  5. Sprinkle Mixed Herbs on Chicken
  6. Place Chicken on baking tray
  7. Spread some Olive oil on Chicken and Vegetables
Leave it for a good 20 to 30 minutes for ingredients to set into the chicken.
Preheat oven and place the chicken into the oven (220 degree celsius, approx 25 minutes).
Turn the chicken after approx of 20 minutes, and spread the olive oil on the chicken.
Use a fork and test if the chicken is cooked and adjust the time accordingly if required.

Serve while Hot!

Good to serve as a Main Course or with some Finger food and Side.

Stir-Fry Lettuce with Dried Shrimps

by | | 0 comments
Stir-Fry Lettuce with Dried Shrimps

Ingredients
  1. Lettuce (use hand to tear/rip it into big slices)
  2. 1 tablespoon of Chopped Garlic
  3. 1 tablespoon of Dried Shrimps (Washed)
  4. 1 tablespoon of Oyster Sauce
  5. 2 teaspoon of Light Soya Sauce
  6. 2 tablespoon of hot water
  7. Olive Oil or Any Cooking Oil
Steps
  1. Add Oil into hot pan
  2. Add Dried Shrimps and stir-fry until fragrant
  3. Add Garlic and stir-fry until fragrant
  4. Add Lettuce and stir-fry for approx 1 to 2 minutes
  5. Add Oyster Sauce and Light Soya Sauce and stir-fry
  6. Add 2 tablespoon of hot water and stir-fry for approx 1 to 2 minutes 
Good to go with Rice and 2 to 3 more Chinese dishes.

Tips and Comments:
  1. Use hand to rip/tear lettuce into slices instead of using a knife as knife blade may react with lettuce causing oxidation, thus increasing the browning effect of lettuce.
  2. Do not tear lettuce into small slices as during the stir-fry process, lettuce will shrink. 3 to 4 cm on the "width" will be a good size.

Chinese White Radish Soup

by | | 0 comments
Chinese White Radish Soup

This is one of my favourite soups that my mum cooked for us, I can simply add some rice into the soup and this will be my meal of the day! Hence, when I start to cook, this can't be missed out in my recipes! It is important to note that there are a lot of nutritional values in this soup and it helps in our digestive system and reduces heatiness too.

Ingredients (Serve 4 Pax)
  1. 1 White Radish (Peeled and Cut into big chunks)
  2. 1 Chicken Bones/ 6 pieces of Pork Ribs
  3. 1 1/2 tablespoon of Wolfberry (Gou Qi Zhi) (Washed)
  4. 1 Big / 6 Small Dried Scallops (Washed)
  5. 6 Red Dates (Washed)
  6. 2 tablespoons of Light Soya Sauce 
Steps
  1. Boil Chicken Bone or Pork Ribs for a few minutes and drain it
  2. Put Chicken Bone or Pork Ribs into pot filled with approx 5 to 6 cups of water
  3. Add Radish, Scallops and Red Dates into pot
  4. Boils it for 30 minutes and turn to slow heat for at least another 45 to 60 minutes.
  5. Add Wolfberry and boil for another 10 minutes
  6. Add Light Soya Sauce to taste.
Good to go with Rice and 2 to 3 more Chinese dishes.

Tips and Comments:
  • You can replace Dried Scallops with Dried Octopus, the soup will taste better - I didn't do that because my boyfriend hates octopus in soup. =)
  • Light Soya Sauce will be better than Salt as it will immerse into the radish and it makes the radish and soup taste and look better.
  • No Carrot in White Radish Soup - My mum always say so. I believe she read this from some Chinese Medical News, hence, is better to avoid if possible.

Pork or Beef Meat Patties

by | |
Ingredients
  1. 300 grames of Minced Pork or Chicken
  2. 3/4 tablespoon of Diced Chives
  3. 1 tablespoon of Chopped Yellow Onion
  4. Mixed Herbs (Rosemary, Parsley, Basil, Oregano. eg. Brand Masterfood)
  5. 3 teaspoons of Light Soya Sauce
  6. 2 teaspoons of Red Cooking Wine (eg. Brand Virgina Dare)
  7. Coarse Black Pepper
  8. Olive Oil
Steps
  1. Mixed all ingredients (except Olive Oil) into Minced Pork or Beef and marinate for a good 20 minutes
  2. Divide portion into flat round patties
  3. Add Olive Oil into pan
  4. Put patties into hot pan and fry for 5 minutes and turn patties until fully cooked.
Good as a Finger Food in a party or as Side or simply a meat patty in a burger

Tips and Comments:
  • Add Chopped Water Chestnut for a crunchy taste.
  • Add Potato (cut into small dices) for a different taste 

Grilled Salmon

by | | 0 comments
Grilled Salmon

Majority of us will know the benefits of eating Salmon. Salmon is well known for its Omega-3, which decrease the risk of cancer, heart diseases. In addition to that, Salmon also helps in our complexion too - reducing wrinkle and pigmentation, improve our glow and hydration, etc etc.. Gals... so what are you waiting for? =P

Ingredients
  1. Salmon
  2. Olive Oil
  3. Salts
  4. Coarse Black Pepper
  5. Mixed Herbs (Rosemary, Parsley, Basil, Oregano. eg. Brand Masterfood)
  6. 2 teaspoon of Sherry Wine (eg. Brand Virginia Dare)
  7. Lemon
Steps
  1. Grease Olive Oil on your baking tray
  2. Sprinkle Salts on Salmon
  3. Sprinkle Black Pepper
  4. Sprinkle Mixed Herbs
  5. Add Sherry Wine
  6. Shred some Lemon Skin on Salmon and squeeze some Lemon Juice on it
Leave it for a good 10 to 20 minutes for ingredients to set into the Salmon.
Sprinkle some Olive Oil on Salmon
Preheat Oven and place the Salmon into the Oven (200 degree celsius, approx 15 minutes).
Turn the Salmon after approx of 12 minutes, and spread the olive oil on the Salmon.
Use a fork and test if the Salmon is cooked and adjust the time accordingly if required.
Serve while Hot!

Good to serve as a Main Course or it can go with Pasta too.

Tips and Comments:
  • This is one of my favourite recipes as it is so easy to cook with minimum preparation. Taste Good too!

Hotdog (Sausage) Prata

by | | 2 comments

Hotdog Prata
(Thanks Jude for taking this photo during lo hei session)

This is one of the list of party food that I had for the first party that I have organised.

I guess the most difficult parts to organise a party is fixing a date and gathering majority of the invitees to attend, planning the list of foods, and getting the food ready when all guests arrived.

I am fortunate on my first tough mission as my colleagues are nice and it was supposed to be a Chinese New Year Lo Hei Session, hence there isn't too many Saturday to choose from! =) But my second tough mission wasn't that easy thou' due to my inexperience in organising a  party and I am the only manpower with my boyfriend as my assistant. Hence, the list of food must be easy to prepare and it has to be fuss-free to eat, hence finger food is what I have in mind.

As I was cracking my brain and planning the list of finger food for this party, my boyfriend suggested this as this is one of our favourite "grab and go" when we go to Ang Mo Kio Hub (a shopping centre in Singapore).

Thanks to all who have attended that day, and Jared who has been brain storming with me on the food list and of course my boyfriend, Chris for being my assistant for the day and going around buying the ingredients and the lo hei!

Ingredients
  1. Plain Prata (Can be bought in Supermarket, eg. Brand Fairprice (NTUC)
  2. Hotdog (Sausage) (Any favour of your preference)
  3. Mayonnaise (Good to be low fat for gals especially! eg. Brand Kraft, Best Food)
  4. Lettuce (Wash and Cut into slices)
  5. Chilli or Ketchup (eg. Brand Heinz, Maggi)
Steps
  1. Pan-fry Prata on a hot non-stick pan, take approx 2 to 4 minutes (follow the instruction on the packing of the prata)
  2. Once Prata is done, take it out from the pan
  3. Add Lettuce on Prata, follow by Hotdog
  4. Add Mayonnaise and Chilli or Ketchup depending on your preference
  5. Wrap the Prata, you can secure it with a toothpick
Serve while Hot!

Tips and Comments:
  • This is not too suitable as a party food as this has to be serve hot. Once Prata turn cold, it will not be as nice.
  •  Add more lettuce to give a more refreshing taste.
  • Recommended to use a non-stick pan to avoid prata from sticking onto the pan, if not, remember to lightly grease the pan.

Mixed Porridge (Congee) with Prawns, Chicken and Pork

by | | 0 comments

Mixed Porridge

I am feeling lazy today and since I am eating alone, I cooked something easy and light.. Porridge!

Ingredients (Serve 2 pax)
  1. 1 cup of Uncooked Rice
  2. 6 Prawns (Deshelled)
  3. 8 slices of Lean Pork
  4. 8 slices of Chicken (Remove the bones)
  5. 3 slices of Ginger (Peeled)
  6.  Fried Onions (Optional)
  7. Chopped Chives (Optional - I didn't add it as personally, I don't like the taste of it in porridge)
  8. Fine White Pepper
  9. Light Soya Sauce
  10. Sesame Oil
Preparation
  1. Marinate Pork with 1 tablespoon of Soya Sauce and 1/2 teaspoon of Pepper for 15 minutes
Steps
  1. Cook Rice in pot with 3 to 4 cup of water and boil it
  2. Once water is boiled, lower down the heat and stir occasionally until rice is break down to porridge
  3. Add Pork and Chicken and stir for approx 3 to 4 minutes
  4. Add Prawns & Ginger and stir for approx to 4 minutes
  5. Add Light Soya Sauce or Salt to taste
  6. Garnish with Chives and Fried Onion, sprinkle some Pepper and add a few drops of Sesame Oil on it
Serve while Hot!

Tips and Comments:
  • Boiled rice with Pork Bones or Chicken Bones and Dried Scallop for better taste
  • Ginger is to remove the strong seafood taste from prawns, hence ginger is not required to be added in if seafood is not one of the ingredients.
  • For this porridge, I will prefer it to be less thick with rice grain still visible (more like Teochew Style than Cantonese Style) hence, the cooking time for the rice grain to break down is shorter.

Baked Potato with Sour Cream and Bacon Bits

by | | 0 comments
Baked Potato with Sour Cream and Bacon Bits
(Thanks to Jude who took this photo during the lo hei session)

Ingredients
There is no hard and fuss rules on the ingredient quantity for this recipe, it depends on your preference. Good to have more bacon bits thou' =)
  1. Potato or Mini Potato for Party
  2. Sour Cream
  3. Chives (Chopped)
  4. Coarse Black Pepper
  5. Bacon Bits (eg. Brand Hormel)
  6. Rosemary (eg. Brand Masterfood)
  7. Parsley (eg. Brand Masterfood)
Steps
  1. Washed Potato thoroughly
  2. Boiled Potato - you can use a fork to test it doneness (if the fork can go throu', approx 15 minutes), once done, drain off the water
  3. Cut the Potato into half, and scooped out some portion of the potato, leaving space approx 1.5cm thickness overall for a solid base to fill up Sour Cream mixture
  4. Grease baking pan and put potato into preheat oven (200 degree celsius, approx 15 minutes)
  5. After 10 minutes, test if potato is fully cooked and adjust timing accordingly if required.
  6. Once fully cooked, remove them from oven
  7. Add Sour Cream, Bacon Bit, Chives, Black Pepper, Rosemary, Parsley and Salts into a mixing bowl and mix well
  8. Fill the Potato with the mixture.
This can be serve Warm or Cold (chilled it).

Good to go with Roast Chicken or as a Side or Cold Appetizer or Finger food in a party.

Tips & Comments:
  • Boiled potato 1st then baked - This is to shorten the baking timing.
  • You can add butter on Potato that just came out from the oven for a better taste.

Singapore Dried Laksa

by | | 2 comments
Singapore Dried Laksa

Something different from what we normally eat or cook, this is a dried version of laksa and it tastes good too. You can just have this as a one course meal without the fuss to cook another few more dishes!

Ingredients (Serve 2 to 3 Pax)
  1. 1 Chopped Red Onion
  2. 1 tablespoon of Chopped Garlic
  3. 1 packet of Laksa Paste (eg. Brand Asia Home Gourmet)
  4. Water and Coconut milk (follow the instruction of Laksa Pasta for the quantity)
  5. 400 grams of Thick Rice Vermicelli (eg. Brand Unicurd or you can purchase them from wet market)
  6. 1 1/2 tablespoons of Dried Shrimps
  7. White Clams (Optional)
  8. 10 Prawns (Deshell)
  9. 1 teaspoon of Fish Sauce (Yu Lu in Chinese) (eg. Brand Thai Elephant)
  10. 1 tablespoon of Light Soya Sauce
  11. Laksa Leaves
  12. Olive Oil or other Cooking Oil
Preparation
  1. Immerse Vermicelli in hot water until Vermicelli are loosen up.
Steps
  1. Add Olive Oil or Other Cooking Oil on hot pan
  2. When Oil is hot, add Vermicelli and stir-fry approx 2 to 3 minutes
  3. Add Light Soya Sauce and Yu Lu and stir-fry for 2 minutes until all sauces are mixed well into Vermicelli
  4. Remove Vermicelli from the pan and leave it aside.
  5. Add Olive Oil or Other Cooking Oil on hot pan
  6. Add Dried Shrimps and stir-fry until fragrant
  7. Add Onions and stir-fry until fragrant
  8. Add Garlic and stir-fry until fragrant
  9. Add Laksa Pasta and stir-fry to mix well with other ingredients in the pan
  10. Add Water and stir well
  11. Add Coconut Milk slowly and stir well
  12. Add White Clam
  13. Add Prawns
  14. Stir-fry and cook for a while approx 3 minutes
  15. Add Vermicelli
  16. Turn to lower heat
  17. Stir-fry until the water is dried up.
  18. Add Laksa Leaves
Serve while Hot!

Good to be served as a Main Course or as a stapler food in a International or Asian theme party.

Tips and Comments:
  • As there is a pre-cook of Vermicelli with Fish Sauce and Soya Sauce and some ingredients like Dried Shrimps are salty, hence when you are adding water and coconut milk to the laksa paste, it is good to taste it 1st and adjust the quantity accordingly.
  • Instead of water, you can use chicken soup for a better taste, but the end result may be more salty - you can change the quantity of other ingredients for a perfect taste.

Stir-Fry Cucumber with Dried Shimps

by | | 1 comments
Stir-fry Cucumber with Dried Shrimps
There are a lot of benefits in cucumber, good for our complexion is one of the well known fact as we can see that there are a lot of facial products that are made from cucumber. Other than that, it is also a cooling vegetable that helps to reduce the heat from our bodies. Hence, if you are feeling some heatiness in your body, you can take this vegetable to cool your body down.

Here is a simple way to cook cucumber to provide more varieties than just eating it fresh and raw, but of course, to retain its nutritional value, eating it raw is the best.

Ingredients (Serve 3 to 4 pax)
  1. 1 Cucumber
  2. 1 1/2 tablespoons of Dried Shrimps
  3. 1 tablespoon of Chopped Garlic
  4. 1 1/2 tablespoons of Light Soya Sauce
  5. 2 tablespoons of Hot Water or Chicken Soup for better taste 
Preparation
  1. Peel off Cucumber skin by using a peeler
  2. Deseed Cucumber by cutting Cucumber into 2 (vertically), use a metal spoon to scoop out the seeds
  3. Cut it into thin slices
  4. Washed Dried Shrimps
Steps
  1. Stir-fry Dried Shrimps onto hot pan until fragrant
  2. Add Garlic and stir-fry until fragrant
  3. Add Cucumber and stir-fry until translucent
  4. Add Light Soya Sauce and Hot Water or Chicken Soup
  5. Stir-fry and Simmer (lower heat) until Cucumber is cooked approx 3 to 5 minutes
Serve while Hot!

Good to go with Rice and a few other chinese dishes.

Tips and Comments:
  • A refreshing dish and is easy to cook with minimum ingredients!
  • I prefer cucumber to be softer in this dish, but if you prefer cucumber to taste crunchy, shorten the time to simmer.

Grilled Portobello Mushroom

by | | 2 comments
Grilled Portobello Mushroom

Ingredients
  1. 6 Portobello Mushrooms
  2. 2 Tablespoons of Chopped Garlic
  3. 3 Pieces of Ham (Cut into very small)
  4. Shredded Mozzarella Cheeze
  5. Salts
  6. Coarse Black Pepper
  7. Italian Herbs (Rosemary, Basil, Parsley. Eg. Brand Masterfood)
Steps
  1. Cut away the stalks from the Portobello Mushroom
  2. Cut Mushroom Stalk into small size
  3. Add Chopped Garlic into Hot Pan and fry until fragrant
  4. Add Ham and Stalks and fry until 80% "cooked" for approx 3 to 4 minutes
  5. Fill up Portobello Mushroom with Garlic, Ham and Mushroom Stalks Mixture
  6. Add Shredded Mozzarella Cheeze on top of the mixture
  7. Sprinkle some Salts, Pepper and Italian Herbs onto Portobello Mushroom
Grease Olive Oil on baking tray or Aluminium foils.
Place Mushroom on it and put into into preheat Oven (200 Degree Celsius, approx 15 minutes).
After 10 minutes, check if mushroom is cooked and adjust time accordingly if required.

Serve while Hot!

Good as a Starter, Finger food or as a Side Dish.

Linguine with Red Pesto Sauce

by | | 0 comments
Linguine with Red Pesto Sauce

Pasta is one of my favourite main courses when I dine outside as it seems to be a "won't go wrong" decision and importantly, it fills my stomach.

I believe that most of us take the easy way out when cooking tomato-based pasta at home, I am no different.
I used to cook tomato-based pasta with off-the-shelves pasta sauce. However, no matter how I cooked it, be it with garlic or tossing it in hot pan instead of pouring warmed ready-made sauce onto the pasta, the taste is nowhere as good as those I ate while dining out.

To be honest, this is one of the few recipes that I have to try a few times before it finally "succeeded". I have done my research on different food blogs, cookbooks, but none of them give me the taste that I wanted. I have experimented and finally I found the keys to this recipe and they are PESTO SAUCE, GARLIC and ONIONS.

I have to say that this is not the perfect taste that I am looking for, but somewhere 80% there, and I eager to share this with my readers!

Ingredients (Serve 2 to 3 Pax)
  1. Linguine
  2. Olive Oil
  3. Salts
  4. 4 Tablespoons of Red Pesto Sauce (eg. Brand Marks & Spencer)
  5. 2 Tablespoons of Tomato based Pasta Sauce (Eg. Brand Prego or Ragu Sauce)
  6. 2 Tablespoons of Chopped Garlic
  7. 2 Tablespoons of Chopped Yellow Onions
  8. 3 Sundried Tomatoes (Sliced)
  9. 2 Big Fresh Tomatoes (Diced)
  10. Italian Herbs (Rosemary, Parsley, Basil. eg. Brand Masterfood)
  11. Coarse Black Pepper
  12. Dried Chilli Flakes (eg. Brand Masterfood)
Steps
  1. Add Olive Oil and Salt into Boiling Water
  2. Cooked Linguine accordingly to the package information (normally around 7 to 11 minutes for Al-Dente)
  3. Drain Linguine and Rinse it with Tap or Cold Water to stop heating process
  4. Add Olive Oil into hot pan
  5. Add Onion and fry for approx 2 minutes till it becomes translucent
  6. Add Garlic and fry until fragrant
  7. Add Fresh Tomatoes and fry for approx 2 minutes
  8. Add Sundried Tomatoes and fry for approx 2 minutes
  9. Turn down to lower heat
  10. Add Pesto Sauces, Tomato Based Pasta Sauces, Italian Herbs, Dried Chilli Flakes, Black Pepper and fry for approx 3 minutes
  11. Turn down to slow heat
  12. Add Linguine into pan and stir to allow sauce to mix well with linguine
Serve while Hot!


Tips and Comments:
  • Add some green and lantern pepper to add on to more taste, nutrition and color to the pasta.

Stir-Fry Minced Pork with Chilli and Tomato Sauce

by | | 0 comments

Ingredients
  1. Minced Pork
  2. 1 Big Sliced Yellow Onion
  3. 1 1/2 Tablespoons of Chopped Garlic
  4. 2 Tablespoons of Chilli Sauce
  5. 2 Tablespoons of Tomato Sauce
  6. Olive Oil or Any Cooking Oil
Steps
  1. Add Sliced Onion onto hot pan, stir-fry until translucent or fragrant
  2. Add Garlic into pan and stir-fry until fragrant
  3. Add Minced Pork into pan and stir-fry until 80% cooked, approx 4 to 5 minutes
  4. Add Chilli and Tomato Sauce into pan and stir-fry to mix well with prawns
  5. Add a little hot water if you prefer the gravy to be slightly watery
  6. When Minced Pork is cooked, you are done
Serve while hot!

Good to go with Rice.

Baked White Snapper

by | | 0 comments
Ingredients
  1. White Snapper
  2. Olive Oil
  3. Salts
  4. Coarse Black Pepper
  5. Mixed Herbs (Rosemary, Parsley, Basil, Oregano. eg. Brand Masterfood)
  6. 1 1/2 tablespoon of Chopped Garlic
  7. 2 teaspoon of Red Cooking Wine (eg. Brand Virginia Dare)
  8. Dried Red Chilli Flakes (eg. Brand Masterfood)
  9. Margarine 
  10. Lemon
Steps
  1. Grease Olive Oil on aluminium foil, place Snapper on aluminium foil
  2. Rub Salts on Snapper
  3. Add Red Cooking Wine
  4. Sprinkle Black Pepper
  5. Sprinkle Mixed Herbs
  6. Add Chopped Garlic on Snapper
  7. Sprinkle Chilli Flakes
  8. Spread Margarine on Snapper
  9. Shred some Lemon Skin on Salmon and squeeze some Lemon Juice on it
  10. Leave it for a good 10 to 20 minutes for ingredients to set into the Snapper.
  11. Add Sprinkle some Olive Oil on Snapper
Preheat Oven and place the Snapper into the Oven (200 degree celsius, approx 15 to 20 minutes).
Turn the Snapper after approx of 12 minutes, and spread the olive oil on the Snapper.
Use a fork and test if the Snapper is cooked and adjust the time accordingly if required.
Serve while Hot!

Good to go with Pasta.

Drunken Prawns in Harvey Bristol Cream

by | | 0 comments
Steamed Drunken Prawns in Harvey Bristol Cream
Ingredients
  1. 15 Prawns (Deshell - Optional and Devein)
  2. 3 to 4 Sliced of Ginger (Peeled)
  3. 3 to 4 Cloves of Garlic (Slightly Smashed with Skin)
  4. 1 Cup of Harvey Bristol Cream
Preparations
  1. Add all ingredients into a container (steamed proof), leave it for 15 minutes
Steps
  1. Put into steamer or rice cooker for approx 15 minutes
Serve while Hot!

Good to go with Rice

Chinese Old Cucumber Soup

by | | 0 comments
Chinese Old Cucumber Soup
For Chinese, drinking soup helps to build up our immune system. Hence, there are many varieties of soup for different type of body system. 

Old Cucumber Soup is one of our soups of the day for Singaporean. It is a light, clear and soothing soup that helps to clear up the heatiness in our bodies. I am not an expert in this, but for body that are more to "cold" side, I believe that you still can drink it, but not too often. =)

Ingredients (Serve 4 pax)
  1. 1 Chicken Bone/ 6 pieces of Pork Ribs
  2. 1 Old Cucumber (Unpeeled, Cut into big chunks, deseed using a metal spoon)
  3. 8 Red Dates (Washed) 
  4. 1 1/2 tablespoon of Gou Qi Zhi (Wolfberries) (Washed) 
  5. Light Soya Sauce
Steps
  1. Boil Chicken Bone or Pork Ribs for a few minutes and drain it
  2. Put Chicken Bone or Pork Ribs into approx 6 Cups of water
  3. Add Old Cucumber and Red Dates into pot
  4. Boils it for 30 minutes and turn to slow heat for at least another 45 to 60 minutes.
  5. Add Wolfberries and boil for another 10 minutes
  6. Add Light Soya Sauce to taste.
Serve while Hot!

Good to go with Rice and two Chinese Dishes.

Cocktail Fruits Mayonnaise with Rasins

by | | 0 comments
Ingredients
  1. 1 Can of Cocktail Fruits (Drain off syrup)
  2. 2 tablespoons of Rasins
  3. 3 tablespoons of Mayonnaise
  4. 1 1/2 tablespoons of Condensed Milk
Steps
  1. Mix all ingredients into a mixing bowl
  2. Chill it
Serve while Chill!

Good to have this in a Party, or just an after dinner dessert treat.